Showing posts with label Scrapbooking. Show all posts

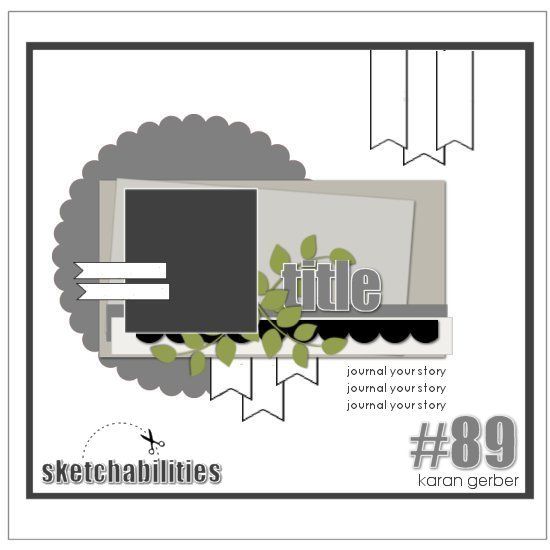
{Rebecca} Sketchabilities Sketch 89

>> Monday, April 15, 2013

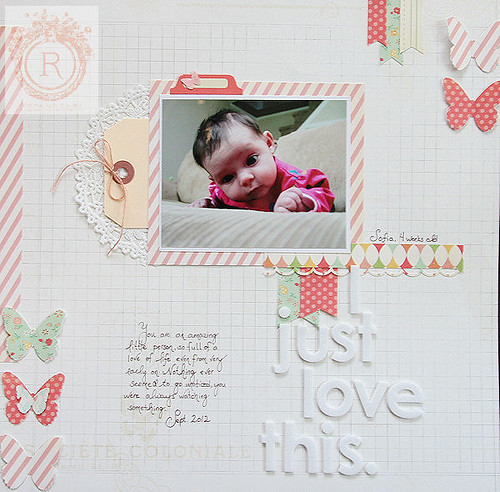
I know I'm a little bit prejudice, but I'm quite convinced that I have the most adorable little girl. I finally printed off some photos and am starting to scrapbook them. Sofia is only 8 months old, but I already feel like she is so big when I look at this photo from her taken at 4 weeks old. She was such a gorgeous little thing and she's grown up so much!

I loved this sketch from Sketchabilities and this may have been the quickest I ever finished a page. It took about an hour. Sometimes I can spend days on a page! But with a sketch like this, it just came together so beautifully.


"I just love this."


Thanks for looking and be sure to take a peak at the beautiful inspiration the rest of the design team has for you!


Read more...

{Rebecca} Sketchabilities 88

>> Monday, April 1, 2013

I kept checking my blog this morning, waiting for my post to come live, but then realized that I had forgotten to even schedule a post for today, hence the quick post, because I didn't plan on making a post!

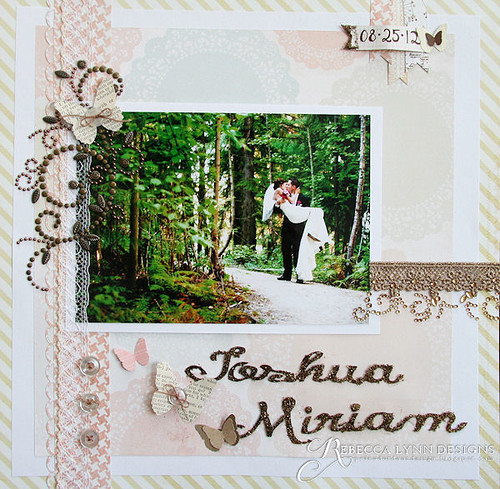
Thanks to another great sketch from Sketchabilities, I have my second page for the wedding album done. This was such a versatile sketch and just perfect for the page I wanted to accompany the first.


My brother and his wife were married at a heritage town so to using the vintage ribbons, buttons, and dictionary pages really helps to tie in the wedding theme to the pages a little.


I also used my Memory Maze chipboard and heavily misted it with some Glimmer Mist. Love the texture it adds to the page!

Be sure to check out the Sketchabilities site, the inspiration from the design team this week is incredible!

Read more...

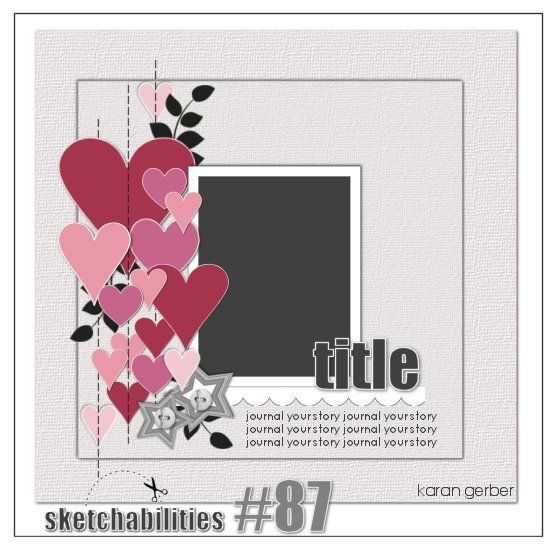
{Rebecca} Sketchabilities 87

>> Friday, March 15, 2013

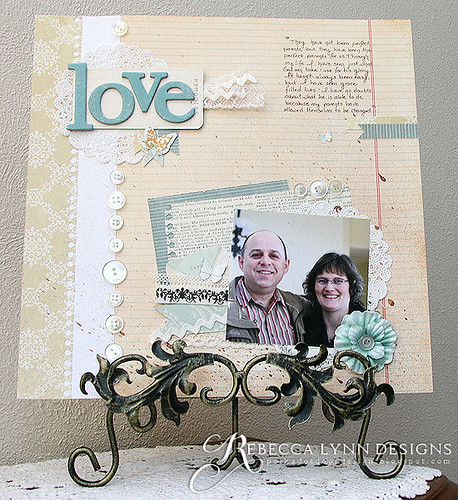
With each sibling that has gotten married, I have added 4 pages to a scrapbook that I started for my Mom. Its been incredibly fun and rewarding project, and promises to be a long running book, as not even half my siblings are married, and the youngest is only 5. One thing I have very much enjoyed about this particular project is that it showcases my evolving style and scrapbooking growth, all in one book, and since it is my Mom's. Once I am done a page, regardless of whether I was fully satisfied with the results, I can't change anything.


There were 4 weddings in the book, and I'm started on the 5th. This is the first page, and I'm sure I will be sharing more with you in the future, especially since there are some gorgeous sketches coming up with Sketchabilities that I know will work perfectly for wedding pages.

I'm quite happy to introduce you to the first of (hopefully) many sketches from Sketchabilities.


Be sure to check out the Sketchabilities website for more great inspiration from the rest of the design team, and for a chance to win a spot as the March Feature Designer!

Read more...

{Rebecca} Sketchabilities DT

>> Saturday, February 16, 2013

I'm excited to tell you that I'm now a designer for Sketchabilities, along with a wonderful group of international ladies! So glad to get a change to work with Karan and her incredible sketches. I'm so excited to be on a scrapbooking team, and not just cardmaking, going to love the push to get on top of all those photos that need to be preserved. If you've never been to the blog, you need to check it out, Karan has some wonderful sketches to work with.


Congratulations to all my fellow team members too!
Jacqui Hunt- AUSTRAILIA
Marit Calles- SWEDEN
Meishia Liu- U.S.A
Miranda Wedekind-THE NETHERLANDS
Palina Sakharuk- BELARUS
{Rebecca Mosher - CANADA}

Read more...

{Rebecca} Now We Are Family

>> Tuesday, January 29, 2013

Now that we are settled back into life after being gone for nearly 2 months, I'm finally finding time to sit down and get some crafting done. It feels so good! I used to be able to spend all day long at if it I wished, but now that Sofia is getting older, I'm finding that I am spending more evenings with my paper. She is so much fun that I have a hard time doing much else when she's up. We're busier than ever, but life is that much more fulfilling. I'm sure you all know what I mean!

My very best friend also happen to be a very talented photographer (see her site here) and came up in September to do family photos for us. I was thrilled with the result and so much fun turning the pictures into a layout.


I used the following challenges as inspiration for this layout :

Zeus and Zoe : Word Inspiration
Sketchabilities : Sketch #83


Read more...

{Rebecca} The Good Old Days

>> Monday, October 1, 2012

Its the beginning of a new month and that means it time for a new challenge at Scrappin Patch. With the arrival of my little girl, I took quite a few weeks off from my regular duties on my DT commitments, but I'm right back into the swing of things with this fun sketch!


I took a few liberties (as always!) and created a fun layout using photos from a family trip we took last year.


Read more...

{Rebecca} Love is always in Season

>> Wednesday, August 1, 2012

How gorgeous is this sketch from Once Upon a Sketch? I've been looking around for layout challenges for a while that could help get the mojo flowing and I have to say that I think I found what I'm looking for. The site is gorgeous and all the wonderful inspiration from the design team is almost overwhelming! Thanks ladies for the kick start!

I also used this inspiration board from Berry71Bleu for some added inspiration. There's a few little butterflies scattered throughout the page. Somehow I am finding it very difficult to leave them off any project that I do!


I started with some pretty pastel colours and just allowed the page to grow from there. I love how I ended up having all the right shades of turqoise, even though I didn't think I had any in my stash! The new American Crafts Knock Out punches have been getting a work out over here, but they're just so much fun!

SUPPLIES
Prima Paper, flower, ribbon
Vintage Buttons, ribbon, dictionary paper
American Crafts Knock Out Punch
Martha Stewart Butterfly Punch
Crate Paper Chipboard

Challenges

Read more...

{Sarah} Catered Crop: Washi Tape

>> Saturday, July 28, 2012

I freely admit to everyone (except my husband), that half of my love for scrapbooking is the excuse it gives me to shop for supplies.  I am such a sucker for pretty little packages, so of course I have jumped right on the washi tape bandwagon.  There are so many gorgeous designs to choose from, and as more and more manufactures are creating decorative tape to coordinate with their lines... well, let's just say there is way too much temptation out there!


So I have been happily accumulating a little stash of pretty washi tapes...and trying to come up with creative ideas for how to actually use it.  That is why I was so excited to see this week's recipe swap over at the Catered Crop - Washis Up.  

Supplies used - October Afternoon patterned paper, alphabet stickers,
 label stickers, American Crafts cardstock & thickers, Basic Grey glazed brads,
 Carolee's Creations mini alpha stickers, Studio Calico die-cut stickers

Linda put together a fabulous inspiration board of ways to use washi tape, but in the end, I used my tape in a really basic way on this layout.  One of my favorite things about washi tape is that in addition to being pretty and decorative, it is also functional - as adhesive (that is wonderfully re-positionable!)


And if you need, or want, to add to your own washi tape collection, make sure you link up an entry to this week's challenge because one lucky winner will be receiving a $25 gift certificate from Chickydoddle!


Read more...

A "Sweet" Layout

>> Friday, July 6, 2012

Since I am a scrapbooker, one of the very best presents that my family can give me, almost as good as even better then scrapbooking supplies, is nice photos.  Needless to say, I was pretty happy with the Mother's Day gift that my children gave me this year - they consented to be dressed in matching outfits and have me take pictures of them. They are still little enough that they think wearing matching outfits (that Mom made for them) is cool, but I realize my days of being able to talk them into this type of thing are probably numbered so I am going to enjoy it while it lasts.

Supplies used: Echo Park "Sweet Day" Collection, Jenni Bowlin mini alpha stickers

This layout makes me happy.  Aside from the fact that all four of my kids are kind of facing the camera at the same time in these photos, I really like combination of the red barn door with the kid's green/teal clothes in the pictures.  I was a bit concerned about finding papers that would match so I actually had most of the prints done in black and white.  A few months ago I was lucky enough to win this gorgeous collection from Echo Park and when it arrived in the mail I was pretty thrilled when I realized how well it worked with these photos! Plus I managed to squeeze just about all of my favorites into this layout - chevrons, doilies, clouds, butterflies, tiny alpha stickers, a pennant banner, a flag, a scalloped border...


Read more...

Happy Independance Day!

>> Wednesday, July 4, 2012

Okay, I actually live in Canada so technically I don't celebrate Independence Day, at least not in the way that most Americans do.  Last year though, on July 4th, I "gained my independence" and gave birth to an adorable baby boy, which gives me great cause to celebrate the 4th.   Ironically, my other son was born on Labour Day...

At any rate, all of the holiday themed projects that have been appearing on the internet inspired me to cut into some of the October Afternoon Rocket Age collection that I have been hoarding saving for just the right moment.  This layout has absolutely nothing to do with Independence Day, or even my son's first birthday, or even the son that was born on July 4th, but hey, it looks kind of patriotic so I am posting it today!


Have a wonderful day, whatever you happen to be celebrating!


Read more...

Catered Crop: Color Me A Rainbow {Sarah}

>> Monday, June 25, 2012


This week I am so excited to be joining the lovely ladies (including my own sister, Rebecca) over at the Catered Crop as a member of the design team!  I cannot even begin to tell you how much of an honor it is to have been asked to join such a talented group of crafters.


This week's recipe swap is "Color Me A Rainbow" and it gave me the perfect excuse to break into some of the October Afternoon "Fly a Kite" collection that I have been hoarding.  I have a special affection for this collection because it is the line that started my obsession with OA products.  I really like the cheerful color scheme and the whimsical designs.  

  Supplies used: October Afternoon patterned paper, stickers and journal card, 
Jenni Bowlin vintage buttons, American Crafts thickers, ribbon and cardstock.

I am not sure if my design quite lives up the expectations I had for this paper, but in the end I am really happy with this layout for a completely different reason.  While I was working on it, I jokingly asked my husband if he would do the journaling for me. To my compete surprise, he said "yes".  Since the photos are of our kids with their great-grandmother on his side, I think it is special to have their daddy's perspective on the day. 


Read more...

Scrappin Patch : Origami Dress Tutorial

>> Thursday, June 14, 2012

 
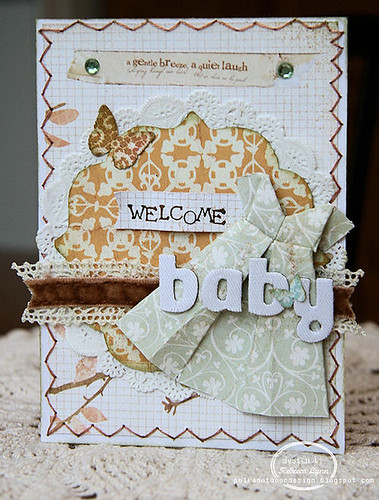
A few months ago I saw an adorable little card with a handmade dress embellishment and decided then and there, I was going to master the skill. It took a little bit of searching since I had never attempted origami before and had no idea where to begin, but I finally found a a youtube tutorial that helped me through the process and help me create something that has become one of my favourite little tricks that I've picked up. I've attached the youtube link to this post as well, just in case my photo tutorial and instructions are a little hard to follow. It took me a few tries to get it just right.

My most recent Scrappin Patch kit came full of yummy Prima Songbird papers and they were just the right texture and pattern for this little dress. You don't want to use a really heavy paper because it doesn't fold easily, but you also don't want to use a lightweight paper as it will tear! Some medium is perfect.


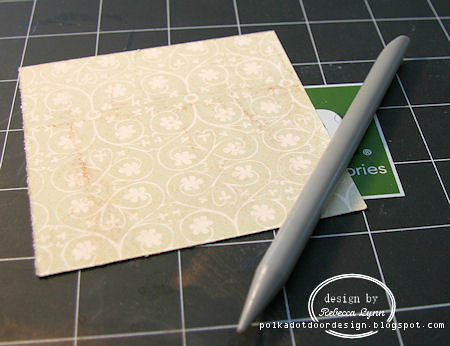
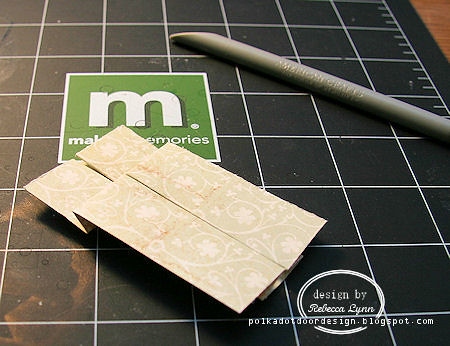
The only tool you (may) need is something to press the folds and help get them nice and sharp. But fingers work well too! You want a square piece of paper approx. 1/2 inch larger than the finished size you want to end up with. In this case, I am using a 3.5 x 3.5 inch square.


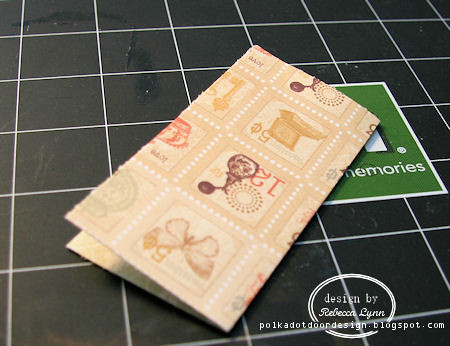
Fold your paper in half. Crease this line well.


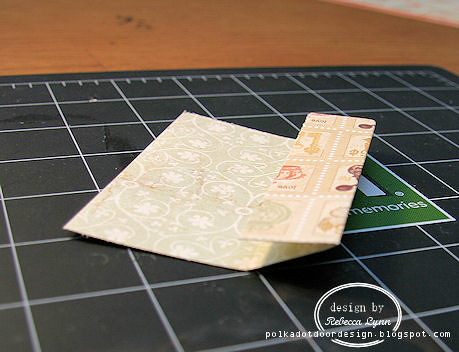
Then unfold your paper, and fold the edge to the center crease.Repeat with the opposite side.


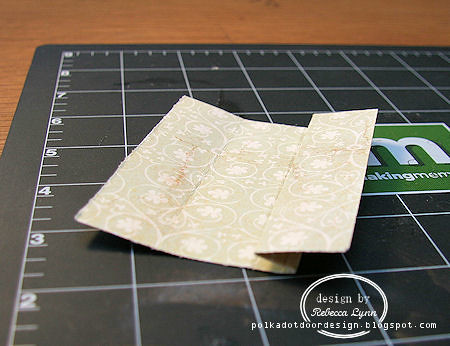
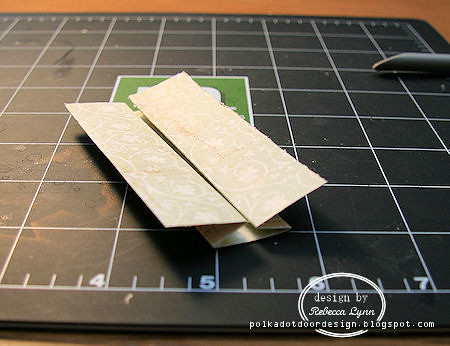
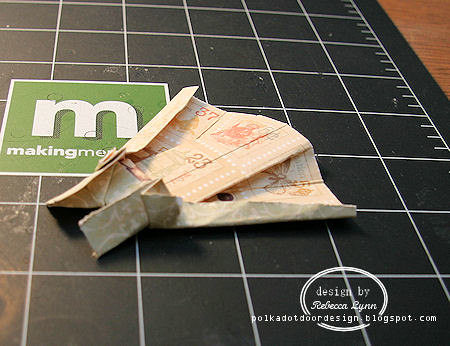
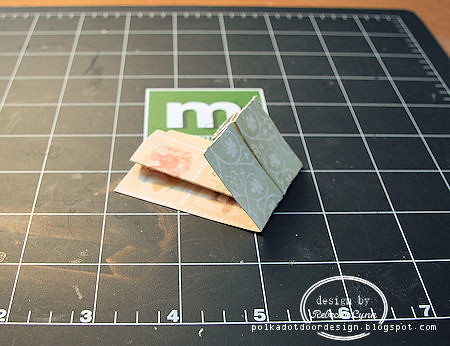
Unfold your paper again and fold half of your halves, in half again. Its a bit complicated to explain, but hopefully you can see what I mean in the photo. Repeat. The end result is that you want it to look like this :


Be sure to crease these folds well. This is the basis of your dress form and the sharper the lines are, the better.


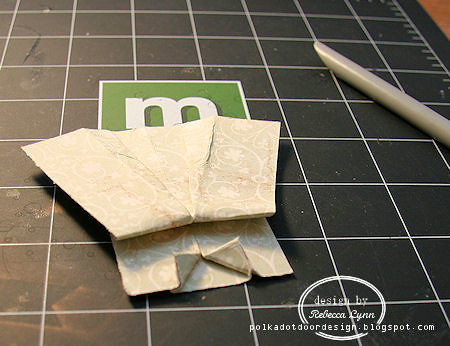
Now turn your paper over and fold it at about the 1/3 line. This fold is very customisable, as it creates the separation between the skirt and the bodice of the dress. Depending on the style of dress you want to create, you may want to change the length of this fold. 


Fold it once over itself so that your paper now looks like this. 


To create the full dress, you want to gently pull one section of the skirt so that you are opening up the part from the bottom up. The waistline will no longer be straight across, but a slight "v" once both sides of the skirt are pulled open. Crease these lines sharply. 


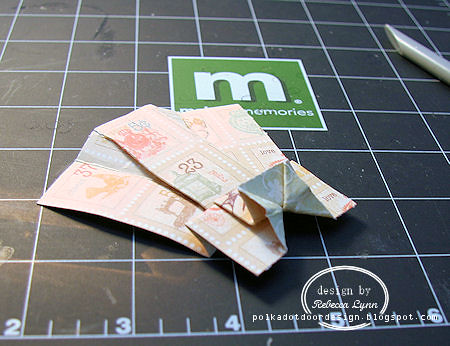
We're now creating the neckline. Bring the corners of the topmost layer of the paper and fold inwards.


This is probably the trickiest part of the dress... Unfold your neckline, turn the dress over and pull the corners inside, pulling down the excess paper as you go so that there is a full "v".


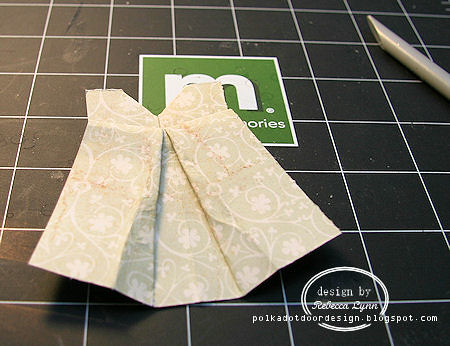
This is how the front should look.


Again on the backside of the bodice, fold the sides of the bodice in, you may have to crease the skirt a bit to help everything line up as well. Then take the corners of your turned in sides and fold them out again, creating the sleeves.


and thats it, you're done! Hope you were able to understand my instructions! The youtube video is an excellant resource if you get stuck.


I just love how easy this dress is once you get the hang of it. You may need to practice on scrap paper before you attempt working with your nice paper, but its such a fun little dress, and perfect for so many applications. Now that I know how, I have to tell myself not every card needs a dress. Little boys really are more into trucks and puppy dogs ....

Thanks for stopping in!

Read more...

Oh Right, This is My Blog Too!

>> Tuesday, June 12, 2012

I got so caught up in admiring all of my sister's gorgeous (and frequent) projects that I forgot to post any of my own!

Earlier this year I made the decision to take a bit of a break from being on any design teams or having any commitments in regards to crafting so that I could focus on other areas of my life.  It has been interesting because I am definitely a procrastinator and work best under pressure. Last year when I was on the Apron Strings design team, I frequently didn't receive my kits until a day or two before my projects were due.  And yet I usually managed to meet the deadline, often cranking out 6 or 8 pages in less than 48 hours (and occasionally even being happy with the results!)

It is completely different now.  Since I don't have any deadlines I am challenging myself to be a bit more thoughtful in my layouts, focusing more on capturing the stories of our life, including more journaling and trying out some new techniques.  It isn't uncommon for a layout to stay spread out on my workspace for a few days...which, given that my current workspace is the kitchen table means that my kids are having a lot of "picnics"!

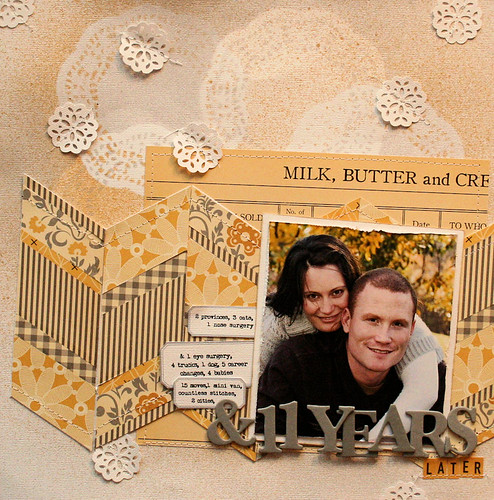
For the layout I am going to show you today, I tried my hand at a paper pieced chevron - something I have seen popping up all over the place on Pinterest.  I also did some misting, which is something I have just started to incorporate into my layouts.  I *swore* that I was not going to get into misting, but then October Afternoon started making mists and my resolve wore down because I am pretty much on a mission to acquire every.single.product they have every made. 


I am pretty happy with how this one came together.  Aside from the fact that it is a relatively decent rare photo of my husband and I together, I am also kind of enamored with the grey and yellow color scheme.  If we weren't renting at the moment I think I would be in the midst of redecorating my whole house in these tones!


Read more...

Something to Share

>> Monday, June 11, 2012

I have two projects to share with you today! We just found out that we take possession of our new home on the 26th of this month so that leaves me with little over two weeks to wrap things up and be ready to go. I am so excited, our new place is a little bit of a dream come true for my husband and I (though some people might look at the fixer-upper we're buying and think we're crazy!). I am so looking forward to having our own place. The rental that we've been in for the past year has been great, but you really are limited to what you can do when its not your own space. All that being said .... with such short notice I decided I better clear up some of my DT commitments, birthday cards that needed making, and spare photos the past few days. You may see a few blog posts coming up shortly, but I'm not actually creating anymore after today. Thats just my lovely pre-scheduled option with the blog. It makes me look so much more efficient than I really am. After today, I'll be running around trying to pack and organize everything and my scrapbooking stuff will be shut away. Who knows when it will see the light of day again? :)

My first project is a birthday card I made using 100% MME products just because :) I've been stashing these bunting chipboard's for since last year and thought it was high time I used them up. I just love the way this card turned out. Its perfect for a certain little girly whose birthday is coming up soon. I knew I needed a "fun" card for this silly person and think it turned out exactly how I wanted it too.

Challenges :

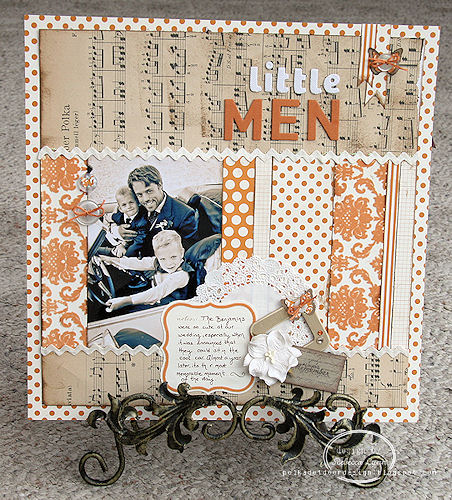
I've had this idea for this page wandering around the back of my mind for quite some time and after organizing my stash the other day in preparation for moving, I decided I'd better hurry and try to get it done! I never really thought of myself as an "orange person" but more and more I find I'm using this colour in combination with others, or just by itself. Apparently I'm a bit brighter of a person than even I knew!  wanted to play along with a new challenge site I found, "The Color Room" but didn't have any gold so am hoping the orange fits into the colour scheme instead. I absolutely love the insipration they used!

Challenges :

Hope your week is going well! We're settling in for some heavy rain this week which means its a good time to get everything organized. My husband works outside, so I know he doesn't appreciate all of this wet weather, I try not to be to thrilled that he gets to stay home most of the week because he's getting behind on his work! I figure its better to have me happy than the customers, right? :)

Read more...

Scrappin Patch : Prima Baby Banner

>> Thursday, May 10, 2012

I have to say, this is probably one of my favourite projects to date. I haven't quite decided yet if its because anything associated with my little one is a happy thought, or I was sent a box full of gorgeous Prima product to work with and I love how this turned out.

With the exception of the chipboard letters and doillies, everything here is from the Prima Songbird collection. I love how well it coordinates and just how easy it was to work with the product.


Challenges: 


Hope this inspires you to create something crafty of your own!

Read more...